Human movement can be reduced to three basic categories: pushing, pulling, and hip extension (squatting, jumping, running, and even riding a bike). Functional fitness begins with learning good form for this essential repertoire and then gradually adding weight and difficulty to build stability and strength. Doing these exercises correctly with five pounds, in other words, is better than doing them poorly with 100. In the words of Gray Cook, one of the founding fathers of functional training, “Don’t add strength to dysfunction.”
[contentblock id=1 img=adsense.png]
Classic Push-Up
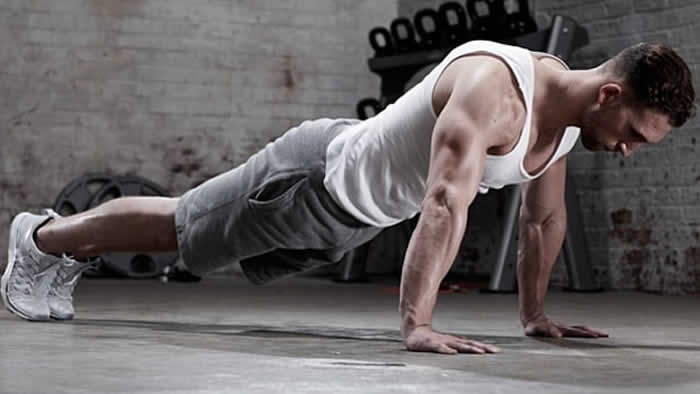
Push-ups activate a chain of muscles – particularly in your arms, shoulders, chest, and back – that are key for everything from getting up off the ground to shoving something heavy into the back of an SUV. The humble push-up beats the bench press for developing this functional push strength because the push-up doesn’t take your back and legs out of the movement.
Technique
- Start in a plank position, holding the spine neutral, no sagging.
- Stabilize the shoulder joints by pulling shoulder blades down toward your heels (this is fundamental to all push-and-pull exercises).
- Place hands so that when you drop, your nipples line up with the base of your palms. Lower until your chest touches the ground.
Advanced Move
- Bosu Push-Ups: To engage your core even more, add an unstable surface to your push-up with a Bosu ball. With the round side down, grab the handles at the edge of the flat disk and do push-ups as described.
Overhead Press
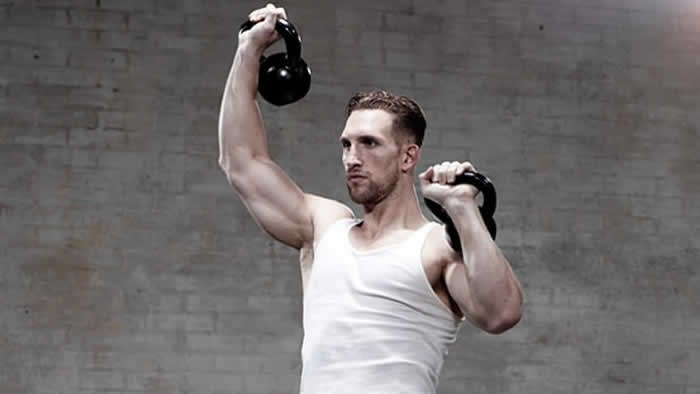
We rarely press overhead while sitting down in real life. Shooting a basketball, putting something up onto a high shelf – it all happens while we’re standing up, so standing presses are the way to go, creating a linked muscular chain from your hands down through your body core into your feet. Use kettlebells or dumbbells instead of barbells because they let the shoulder joint find its own way through a safe range of motion.
Technique
- Stand with feet shoulder-width apart, knees slightly bent, spine held neutral (no arching the back), shoulders stabilized as described before.
- Raise one weight at a time, allowing the hand and wrist to rotate as you push upward.
Advanced Move
- Push press: Simply add a slight squat and then a leg thrust as you push up, since we typically also use our legs when pressing overhead. This makes it a total-body movement and permits higher loads.
Read More: Workouts for Men to Get Ripped at Home
Pull-Up and Chin-Up
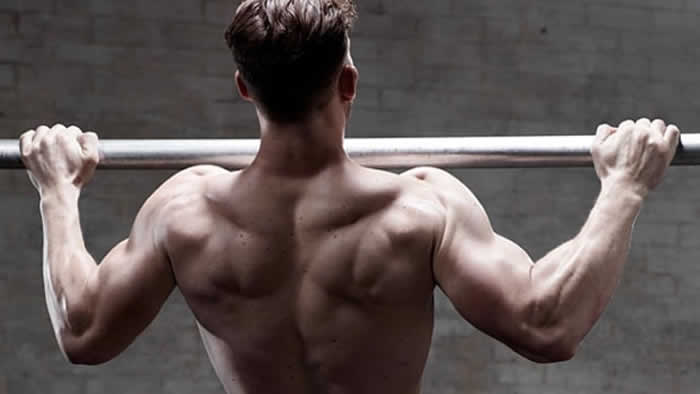
Whether swimming, rock climbing, or just hauling yourself over that wall in your next Tough Mudder, vertical pulling motions are just about the most basic things we do with our arms. Both pull-ups and chin-ups work the entire upper body as a unit, but chins engage the biceps more, while pull-ups de-emphasize biceps in favor of the upper back and triceps.
Technique
- Start with hands shoulder-width apart for chin-ups, wider for pull-ups.
- Stabilize shoulder blades (as described before).
- Bring your chin above the bar and lower down to straighten arms on each rep.
Advanced Move
- Weighted push-up: Once you can do three sets of 10 pull-ups or chin-ups with body weight alone, add a light dumbbell between your legs, increasing the weight over time.
Row
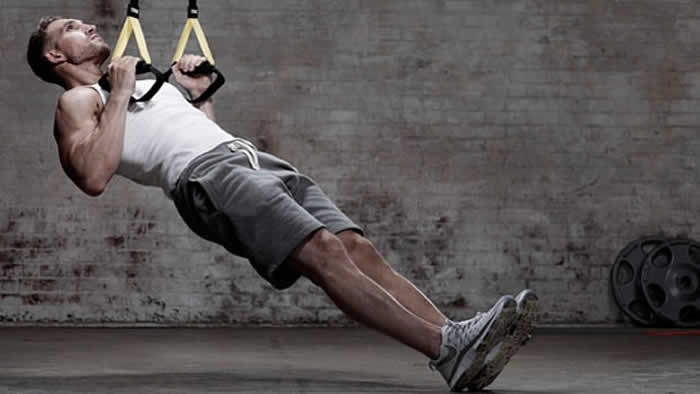
We pull on things all the time, but pull strength and stability are even more valuable for correcting the forward lean we develop sitting at a desk all day. There is no better tool for horizontal rows than adjustable fitness straps. Hung from any doorway – or even a tree – straps allow for a more efficient row than other methods because of the way they demand head-to-heel core stability.
Technique
- Stabilize your spine by engaging your core, without arching or sagging; stabilize the shoulders as described earlier.
- Pull upward until your hands come even with your chest.
- Lower to straight arms, never breaking neutral spine.
Advanced Move
- Increase the angle: Lower the straps – the closer you get to parallel, the harder the pull.
Squat
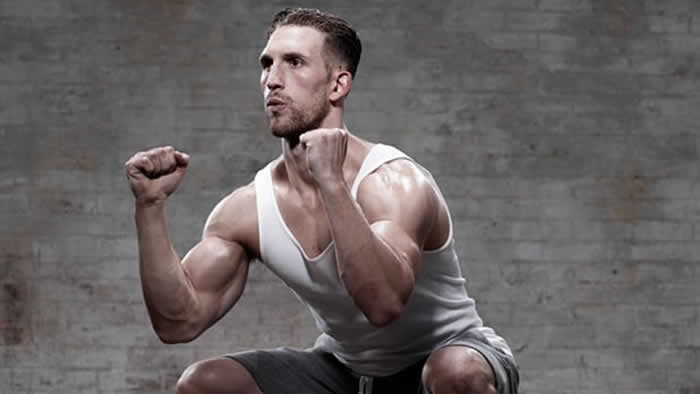
For the most elemental of human movements – sitting down and getting back up, or lifting something heavy off the ground – there is no better exercise than the squat. But form is incredibly important for preventing injury, so start with unweighted “air squats” to develop a full range of motion before adding weight.
Read More: How to Perform a Proper Front Squat Workouts
Technique
- Stand with feet wider than shoulder width, toes splayed 30 degrees, your chest up and butt back. Weight should be on your heels, not your toes.
- Squat by pushing your butt backward, not by bending your knees forward.
- Knees should track directly over the feet, never caving inward or outward.
- Bring your thighs parallel to the floor while keeping your weight on your heels and your spine straight and solid.
Advanced Move
- Back Squat: Once you can hold good form through 20 body-weight squats, add weight by resting an empty barbell on your back, and then add plates as you progress.
Kettlebell Swing
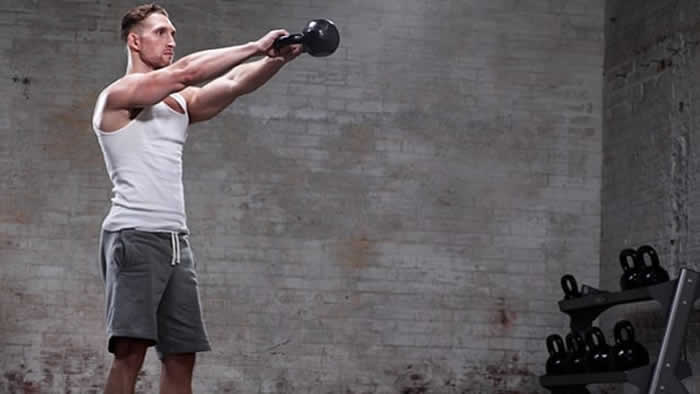
Athletic power is the ability to accelerate weight – it’s not just about applying force, but applying it quickly. Almost every sport depends on power, from sprinting to driving the pedals of a bicycle. The kettlebell swing is the perfect foundational power exercise, Boyle says, “because it’s simple and explosive.”
Technique
- Stand with feet slightly wider than shoulder width, toes slightly outward, and hang the kettlebell between your legs.
- Lock the shoulders by pulling the shoulder blades down toward your feet.
- Bend at the hips to push your butt backward while the kettlebell hangs loose in front.
- Snap hips forward. Don’t pull up the bell with your arms; stand up explosively and let it fly up on its own. But control is everything, and the bell should reach only eye level.
- On the backswing, let arms come flat against your torso with the bell between your legs.
Read More: How Music Might Improve Your Workouts
Advanced Move
- One-Armed Kettlebell Swings: These are done exactly the same way as regular swings but require much more body control.
Dead Lift
The strength in hip extension comes from your posterior chain, a string of connected muscles running from your hamstrings up through your glutes into your lower back. Nothing trains the posterior chain better – while protecting your lower back against the lumbar pain so typical of middle age – than the dead lift. Russian kettlebells make the perfect learning tool because even the light ones – use a 20-pounder to get the movement down – have handles high enough off the ground that you don’t have to bend over too deeply to get started.
Technique
- Stand with feet shoulder-width apart, toes pointing outward 30 degrees, kettlebell on the floor between your feet, centered one inch in front of your shins. Weight should be on your heels, never the toes.
- Your spine should be straight, with shins perpendicular to the floor while you move your butt backward, bending at the hips. Once you can reach a kettlebell handle this way – without hunching forward in your lumbar spine – grab the handle with both hands.
- Drive upward by forcing your hips forward, not by pulling up with your hands.
Advanced Move
- Barbell Dead Lift: Barbells are the dead lift tool of choice because they make it easier to adjust weight in tiny increments. Once you’re comfortable with a 35-pound kettlebell dead lift, start using a 45-pound bar, adding plates as you get stronger (if using anything smaller than 45-pound plates, be sure the bar is being lifted from a rack at about mid-shin level to ensure
proper form).
[contentblock id=3 img=gcb.png]
Walking Lunge
The most surprising functional-training advance of the past 15 years is the understanding that knee pain nearly always begins with weak hips – specifically, the stabilizer muscles aligning the upper leg, from the hip down into the knee. Walking lunges, a kind of exaggerated striding motion, build solid leg joints for everything from the deep knee bends of powder skiing to walking up a flight of stairs. For the walking lunge, simply take one big step forward, plant your foot, and bend your forward knee 90 degrees while bringing the rear knee low enough to almost touch the floor. Repeat with the other foot.
Technique
- Plant your lead foot far enough forward that, as you lower into each lunge, your shin bone remains nearly perpendicular to the floor and the kneecap never extends over your foot.
- Do not rock back and forth with your upper body. Instead, remain perfectly upright with good posture, using abdominal muscles to keep your spine neutral.
Advanced Move
- Weighted lunge: Add weight to each hand at your side while lunging.

